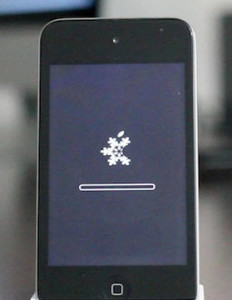
We are late but we have created an easy tutorial to help our readers with Jailbreaking their device on iOS 6 or 6.1 using the Sn0wbreeze tool. This will be an untethered Jailbreak and will preserve baseband. We consider it the most safe and easy way to Jailbreak iPhone 5, iPad Mini etc.
Steps to Jailbreak iOS 6/ 6.1 Untethered Using SnOwbreeze:
Step 1: First of all, download SnOwbreeze from here to your Windows PC.
Step 2: Now, extract the downloaded file into a folder onto your desktop.
Step 3: Next, from the folder where you have extracted the SnOwbreeze file, double-click on “SnOwbreeze.exe” file to open it. (Grant Administrative privileges if asked for.)
Step 4: Now, you will see a pop-up window on your PC, read it carefully and then click on “OK” and then again you will see a screen, read it carefully too and then click on arrow on the screen’s bottom right corner.
Step 5: Once again a screen will appear, just click on the browse button and then select the iOS version you have on your device i.e. 6.0/ 6.0.1 or 6.1.
Step 6: When you select the iOS firmware version, SnOwbreeeze will identify the firmware file. As it has recognized it completely, you will get a success message. Just click on the blue arrow on the bottom right corner of the screen to continue.
Step 7: Now, you will see a screen with 4 options, which are as follows:
iFaith Mode, SimpleMode, Expert Mode and Baseband Preservation Mode.
- iFaith Mode: This mode allows to create a custom IPSW which contains previous SHSH blobs.
- Simple Mode: This mode begins the creating of your custom iOS 6.0/ 6.0.1/ 6.1 IPSW automatically without selecting any customization options.
- Expert Mode: This mode presents you with options for customizing your Jailbreak before creating iOS 6.0/ 6.0.1/ 6.1 IPSW.
- Baseband Preservation Mode: The only useful mode if you want to upgrade to the latest iOS 6.0/ 6.0.1/ 6.1 firmware version without updating your baseband and without Jailbreaking your iPhone.
But, if you follow this guide you will have to select “Expert Mode”. Just click on it to proceed.
You should also know that SnOwbreeze will not update your iPhone’s baseband version regardless of the mode you choose.
Step 8: The next screen which you see is responsible for the beginning of the customization process.
Just click on the “General” button to begin the process.
Step 9: There are other options also in the general screen with which you can customize your Jailbreak differently.
- Enable Battery-Percentage: This option adds a small percentage number next to your battery icon in the status bar.
- Activate the iPhone: This option will activate your iPhone, if it is unlocked.
- Install SSH: This option will install an SSH service which in turn will allow you to view your device’s file system.
- Root Partition Size: This option changes the size allocated to Jailbroken apps. (It is recommended to leave it as the default size.)
Just click on the option you want to apply on your Jailbreak and then click on the blue arrow on the bottom right of the screen.
Step 10: Upon the next screen, you can pre-install 3rd party applications/ tweaks, if you want to do this just find the applications/ tweaks you want to install and select them. Then, click on the blue arrow on the bottom right of the screen to continue.
Step 11: Now, again you will be taken to the customization homescreen.
Just select the Build IPSW option and click on the blue arrow at the bottom right of the screen to continue to the IPSW creation process.
Step 12: SnOwbreeze will now begin the creation of the custom IPSW with the options you have selected. This process may take 5-30 minutes depending on the speed of your PC so patiently wait for the process. As soon as the firmware file has been created it will be there onto your desktop.
You can play PacMan while SnOwbreeze is creating your custom IPSW.
Step 13: As soon as the SnOwbreeze has created your custom IPSW you need to boot your device into DFU mode. To do so, click on the “OK” button.
When you click on the OK button you need to follow SnOwbreeze’s real-time DFU mode instructions. As soon as you do this your device will be in DFU mode and you can restore your custom IPSW firmware file.
Step 14: When you have followed the SnOwbreeze’s real-time instructions as showm, iTunes should launch and you will be prompted by SnOwbreeze saying “iReb” in successfully running, you can go back to iTunes and shift click the restore button. As soon as you have done this you can now select your custom IPSW firmware file which is located on the desktop to restore to your iPhone or iPod Touch.
When your device restored successfully and resorted even, it will reboot and you will see Cydia on the home screen of your device. This indicates that the jailbreak process was successful.
Hurray! You now have the untethered iPhone 4, iPhone 3GS or iPod Touch 4G on iOS 6.0, 6.0.1 or 6.1. Share your views with us or let us know your worries, we are here to resolve the same.

